Step 1
Preparation
Boil a pan of water approximately 4" in depth so that the tray will be fully immersed but keeping the tab above the water. After the water has come to a boil, turn the heat down so it stops boiling and place the tray in the hot water for 5 seconds. The trays will become very pliable at this point and will tend to stick together. While the trays are in this state avoid twirling them as it may damage the natural contour of the tray.
*TIP* If you find your first attempt shrinks your mouth tray too quickly, next time try waiting 15 seconds after the water is off boil before submerging your next tray.

Step 2
Mould Mouth Trays
Lift the tray vertically from the water using the tab. Carefully and quickly place the tray around the teeth. With your tongue against the roof of your mouth, suck the air away from the tray until it begins to feel tighter. This will shape the tray to the teeth.

Step 3
Make Comfortable
Once you are satisfied with the fit, trim the front tab away from the tray with scissors. Make sure it is level with the front surface of the tray.
*TIP* If you find your tray is digging into your gums anywhere, carefully trim down this area until it becomes comfortable.

Step 4
Apply Teeth Whitening Gel
Brush and floss your teeth before continuing. Place a small line of gel (or dad) in the front portion of the tray for it to cover your teeth (usually 0.5cc or less per tray). The gel might irritate the gums if the trays are overloaded. Insert the trays very carefully, keeping the gel on the teeth and away from the gums.
*TIP* Apply the whitening gel by placing a little on your finger and smearing it along your teeth. Then carefully insert your mouth trays. This will allow you to only use as much gel as needed and avoid overfilling your trays and avoid excess gel from going over your gums causing possible sensitivity.

Step 5
Whiten Teeth
Use our Whiter Smile gel for the following duration:
- 10% CP strength for 60 minutes per day
- 18% CP strength for 45 minutes per day
- LED gel with 32 LED light for 10 minutes per day
It's important to know other brands may recommend shorter or longer durations and you should always follow the specific products instructions.
*TIP* If you find you are building up too much saliva you can use the sides of your mouth to suck and swallow any excess. It is perfectly safe to swallow a little whitening gel. You can also try sitting back on the sofa, or even laying down while whitening your teeth and this will reduce excess saliva.

Step 6
Activate Light (Optional)
Open the battery lid by turning it to the left and remove the protective battery slip underneath the batteries. Reinsert the batteries and put the battery lid back on, locking it to the right. Insert your mouth trays with the gel in them. Place your lips over the clear plastic mouthpiece and turn on your light by pressing the ‘on’ button. Use the light every time you bleach your teeth for faster results.

Step 7
Remineralise (Optional)
The remineralisation gel is optional and used after each whitening treatment. In clean trays, apply a small line and let it set in your mouth for 3 minutes. Use after each session for the first 3 days and then once every 3 days while whitening your teeth. Or keep and use when any sensitivity occurs. Do not eat or drink for 30 minutes afterwards.

Mouth Tray & LED Light Variation
32 LED Red & Blue Light with Attached Mouth Trays
Apply a thin line of whitening gel directly onto the mouthpiece where it touches the front of your teeth. No moulding is needed. Place it in your mouth, then press and hold the button for about 3 to 4 seconds to switch it on. Each session runs on a built-in 10 minute timer and turns off automatically. If you want to continue, just hold the button again to start another 10 minutes.
Charge the light for about 4 hours for roughly 60 minutes of total use. If it starts flashing red, the battery is low and needs a recharge. You can use it with any whitening gel, although our LED gel will be the most effective.

Mouth Tray Variation
Premium Mouth Trays
Boil about 300 ml of water, then let it cool for five minutes so it’s warm but not too hot. Place the tray with the white insert inside the coloured one and hold it by the tab. Dip it into the water until the white tray softens and becomes flexible. Quickly place it in your mouth, press it against your front teeth and gums, and suck in to help it mould closely. Bite down lightly, then release so it shapes properly. Once it cools after a few minutes, take it out, remove the coloured tray and trim any excess from the white tray if needed.
Repeat the same steps to create a custom fit for your bottom teeth. When both trays are shaped, rinse them well in cold water and they’re ready to use with your whitening gel.
Shop our exclusive range of teeth whitening kits & gels.
View All-

Whiter Smile
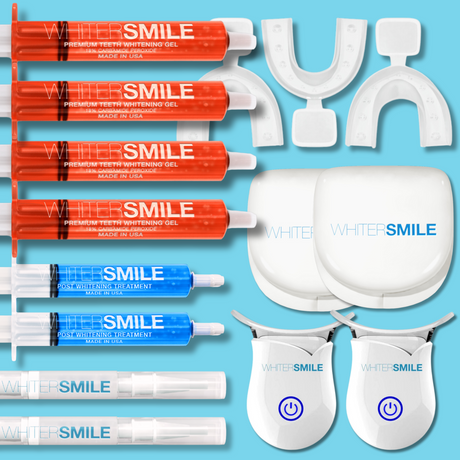
Whiter Smile Whitening Kit (Made In USA)
60 minutes daily • 8 shades whiter teeth
20 treatmentsSale price From $49.95 Regular price $59.95Unit price /Unavailable -

Whiter Smile
Whiter Smile Plus Whitening Kit (Made In USA)
60 minutes daily • 16 shades whiter teeth
40 treatmentsSale price From $79.95 Regular price $104.95Unit price /Unavailable -

Whiter Smile
Whiter Smile Express 6 LED Whitening Kit (Made In USA)
45 minutes daily • 16 shades whiter teeth
40 treatmentsSale price From $89.95 Regular price $124.95Unit price /Unavailable -
Whiter Smile
Whiter Smile Duo Express LED Whitening Kit (Made In USA)
45 minutes daily • 16 shades whiter teeth
80 treatmentsSale price From $149.95 Regular price $249.95Unit price /Unavailable